(360) 433-9870
Article Highlights aka: The TL;DR
- It’s live: ChatGPT now lets businesses claim their own profile at chatgpt.com/business-hub.
- It’s free: We claimed ours on a free ChatGPT account. Plan on 20 to 30 minutes, plus a short review.
- ChatGPT already has a listing for you: Claim the one that’s there. Don’t create a duplicate.
- Two checks: Prove you control the business (phone or website domain), then verify the owner’s ID with a live selfie.
- Read before you click: Claiming gives you a voice, not the final word.
This is a 3 part blog series to get your business found on ChatGPT
Part 1 – Claiming your business profile on ChatGPT
ChatGPT is going to describe your business either way
I’ve been in advertising for almost 25 years, and this feels exactly like the early days of local search. Back in the mid-2000s, Google, Bing, and Yahoo had no idea which local businesses were out there. They leaned on the phone companies’ directories to fill in their listings, and some search engines still lean on sites like Yelp to do it today.
That’s where citation management came from, and why getting your information correct, complete, and up to date mattered so much. Remember NAP? Name, Address, Phone Number. Get one of those wrong and the search engines trust in your business started diminishing.
ChatGPT is in that same spot right now. It doesn’t have the years of local business data Google has built up, so it fills in the gaps on its own. The choice is yours.
You can let ChatGPT decide what it thinks is important about your business, or you can tell it.
Here’s the good news: claiming your profile is free, and it takes about 20 to 30 minutes plus a short review. I claimed City Ranked’s own listing screen by screen, and I’m going to show you exactly what I saw, including the parts that will trip you up.
The examples come from pest control, because that’s where we spend most of our time. The steps are the same whether you run an HVAC, plumbing, roofing, electrical, or landscaping company.
Last verified: November 10, 2026. This feature is brand new and it’s changing fast. I’ll update this guide as the screens change.
Before you click anything, know what you’re agreeing to
Whether you love AI or hate it, this is the new way of doing things, and your customers are already using it. But before you claim your profile, you need to understand what you’re signing up for.
The very first screen says that by continuing, you accept OpenAI’s Businesses in ChatGPT Terms. I read them. Here’s what stood out to me, in plain English, as of the November 9, 2026 version:
- ChatGPT already has a listing for you. OpenAI builds business listings whether or not the owner ever claims them. Claiming just lets you manage yours.
- You get a voice, not the final word. OpenAI can add to, edit, or replace what you submit using other sources. That’s exactly why your Google, Yelp, and other listings still need to be right.
- Your basic info is theirs to use, permanently. Your name, address, phone, category, hours, and website can be displayed even if you stop managing the profile later.
- ChatGPT may call your business. By using Business Hub, you agree that ChatGPT’s AI assistant can call you on behalf of its users. There’s an opt-out link in the terms. Either way, give your CSRs a heads-up.
- One clause goes further than you’re used to. Most of this will feel familiar if you’ve used Google’s business tools. But you also agree not to bring certain legal claims against OpenAI over content published on your websites, past or present. If that matters to your business, have your attorney read it first.
I’m a marketer, not a lawyer, and this isn’t legal advice. Read the full terms at openai.com/policies/businesses-in-chatgpt-terms before you click.
What you’ll need
Gather these before you start, and the whole process takes about 20 to 30 minutes:
- A ChatGPT account under your company email. Use an address on your company’s domain (like you@yourcompany.com), not a personal Gmail. Even better, use a shared address like listings@yourcompany.com, so the profile doesn’t depend on one employee.
- One way to prove you control the business: either someone who can answer your main business phone line, or access to your website’s domain settings (DNS). If you don’t know what DNS is, plan on the phone option, or ask whoever manages your website.
- The business owner’s government-issued ID, such as a driver’s license. The person whose ID it is has to be the one doing this step.
- A smartphone with a camera.
- A well-lit room. You’ll photograph your ID and take a short live selfie.
How to claim your business on ChatGPT, step by step
Step 1: Open Business Hub
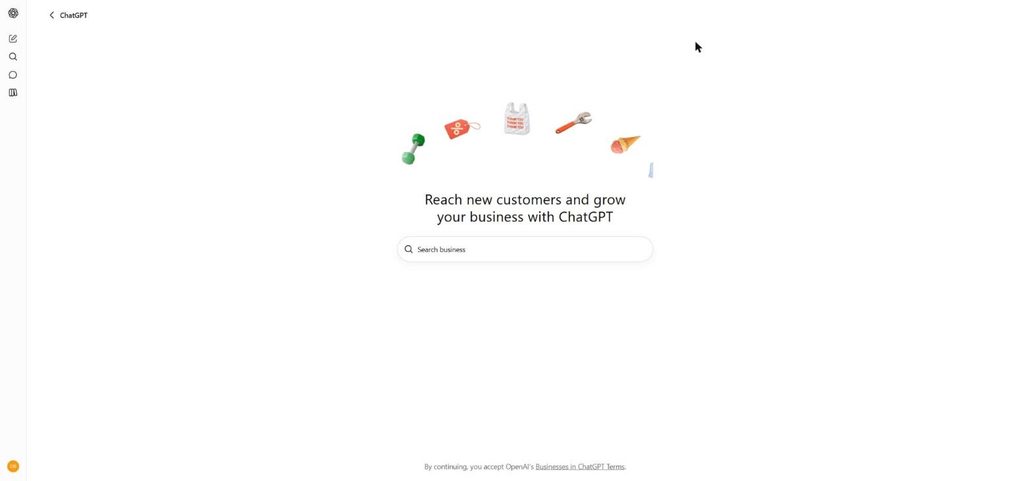
Sign in to ChatGPT, then go to chatgpt.com/business-hub. You’ll see a page that says “Reach new customers and grow your business with ChatGPT” with a search box in the middle.
Step 2: Check which account you’re signed in with
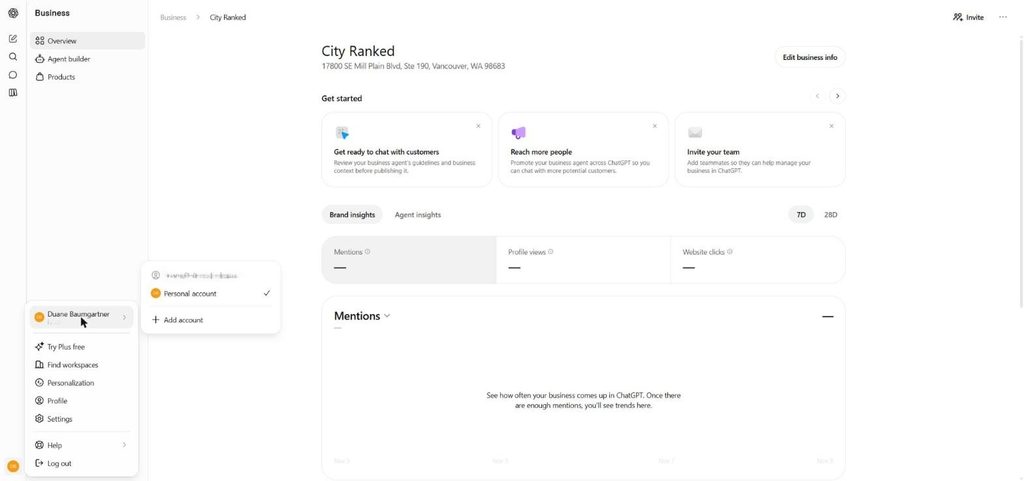
Before you go further, make sure you’re on the right account. Whatever account you use now is the one that will manage your profile.
Click your initials in the bottom-left corner, then click your name. The email shown in gray at the top is the account you’re signed in with. It looks grayed out because it’s a label, not a button. “Personal account” just means it isn’t a team workspace.
Step 3: Search for your business and pick the existing listing
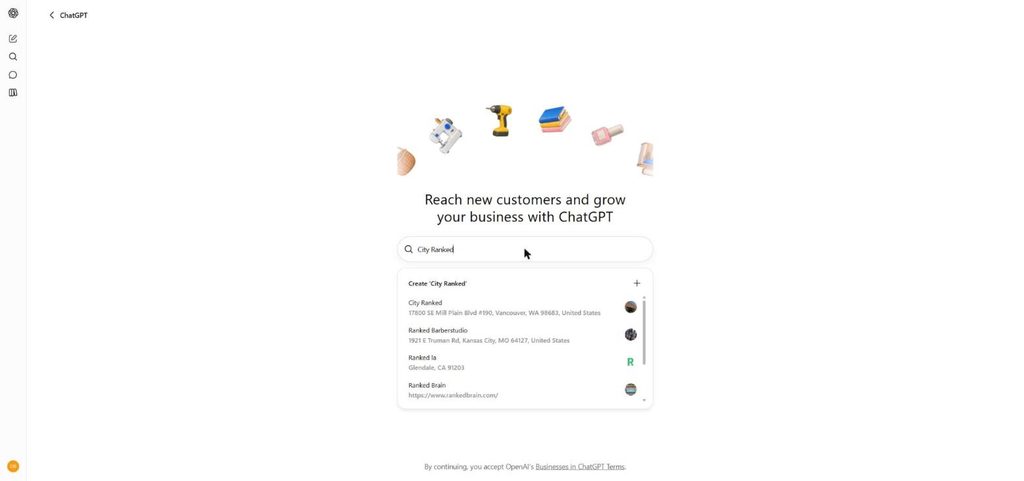
Type your business name in the search box. You’ll likely see your business already listed with your address or website. ChatGPT created it on its own.
Click your existing listing. Don’t click “Create” at the top of the list unless your business truly isn’t there. Trust me, you don’t want to be cleaning up a duplicate listing.
Step 4: Start your claim
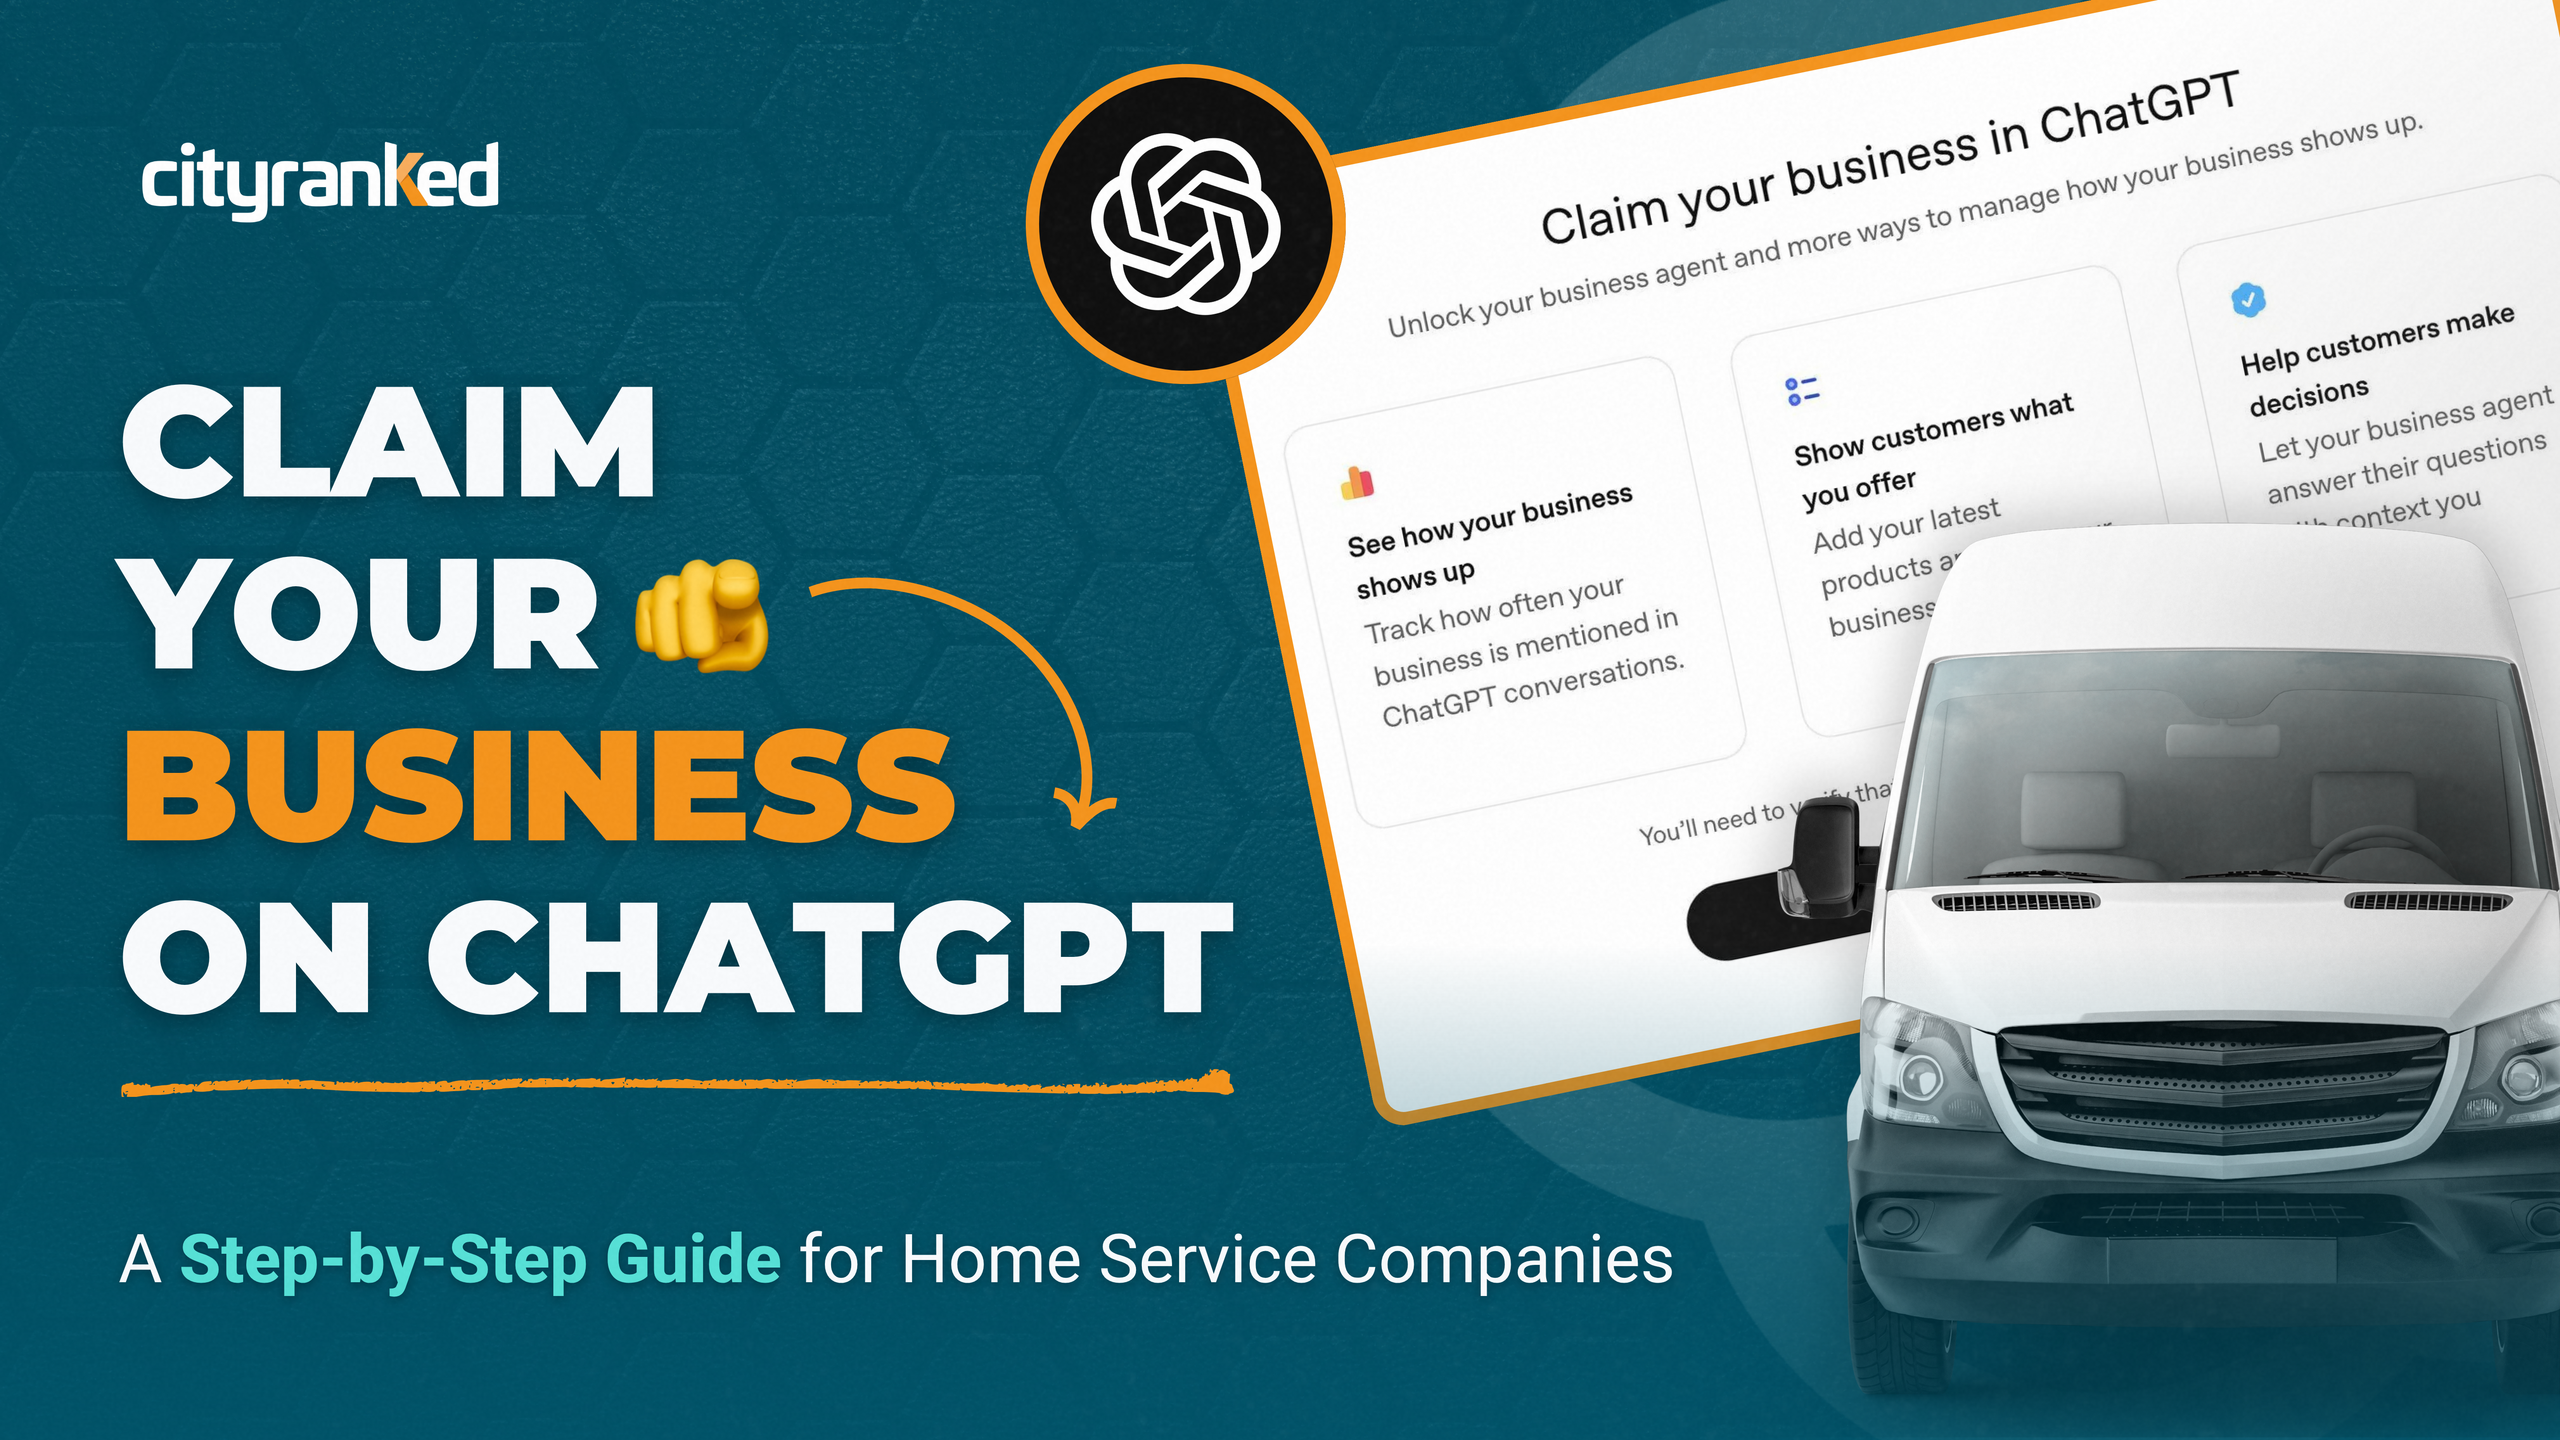
A window titled “Claim [your business] in ChatGPT” explains what you get: tracking how often you’re mentioned, showing what you offer, and an AI agent that answers customer questions. Click Get started.
Step 5: Confirm your account and accept the terms
The next screen shows the email that will manage your profile and a preview of your listing. Clicking Continue here accepts the terms described at the beginning of this article.
Step 6: Choose how to verify
ChatGPT offers two ways to prove you control the business:
- Business phone: you get a code by text or phone call. This is the easiest option for most owners.
- Website domain: you add a small record to your domain settings. This is the better option if you have someone who manages your website.
A warning for home service companies: the code goes to whatever phone number ChatGPT has on file for you. If that’s a call-tracking number, an answering service, or a phone menu (“press 1 for service”), that automated code call may never reach a human. Think about where your main number actually rings before you pick this option. Have someone ready to catch it, or use the domain option.
Step 7: If you chose your website domain, add the DNS record
ChatGPT shows three values to add to your domain settings, each with a copy button:
- Type: TXT
- Name or host: openai-business-claim
- Value: a long code that starts with “openai-business-claim=”
Log in to wherever your domain is managed (GoDaddy, Cloudflare, Namecheap, and so on), add a new TXT record with those values, and save it. Then come back and click Verify domain.
Three tips that will save you a headache:
- In the host field, enter only “openai-business-claim.” Most domain providers add your domain name automatically. If you paste the full version, you’ll end up with your domain in there twice and verification will fail.
- Use the copy buttons. The code mixes characters that look alike (a lowercase l, a capital I, the number 1). Retyping it invites mistakes.
- Finish within 24 hours. The code expires about a day after it’s created. If you run out of time, start this step over to get a new one, and only use the code from the screen you’ll verify on.
Changes can take a few minutes to a few hours to show up. If verification fails the first time, wait and try again.
Step 8: Your claim is confirmed
Once verified, you’ll see “You’ve claimed [your business].” This screen offers four options:
- Start chatting with customers (setting up your AI business agent)
- Manage your business (insights, products, and your business info)
- Get $500 in advertising credit for ChatGPT Ads
- Upgrade to a ChatGPT Business plan
The big button pushes you toward the AI agent. Skip it for now. Get your business info right first. The agent is a bigger decision, and I’ll cover it later in this series.
Step 9: Verify your identity
Your business dashboard will ask you to verify your identity with a government-issued ID. You can’t edit your business info or publish an AI agent until you do.
Click Verify. The check is handled by Persona (withpersona.com), a third-party identity verification company. Here’s how it went for us:
- Choose the type of ID you’re using.
- Click Continue on another device. It’s much easier on your phone. Scan the QR code, or have a link emailed to you.
- Take photos of the front and back of your ID.
- Take a quick live selfie so they can match your face to your ID.
- Submit. Your status changes to “in review.”
Because of the live selfie, the person whose ID it is has to be holding the phone. Your office manager or marketing agency can’t do this step for you.
Step 10: While you’re in review
This is the waiting period. A few things to know:
- Don’t submit your ID again. The dashboard banner may still say “Verify” even after you’ve submitted.
- Editing is locked until review clears. Clicking “Edit business info” just brings up the verification prompt again.
- You can still look around. The dashboard shows your insights area and confirms whether ChatGPT can access your website.
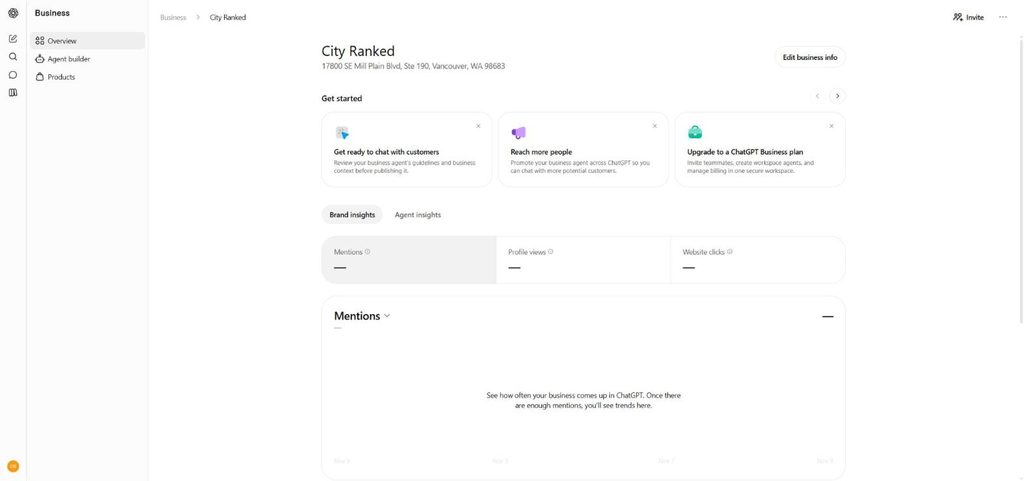
How long review takes: Ours took about 30 minutes until our profile was approved.
What a claimed profile is built to do
Here’s what you’re actually getting: correct information, correct hours, correct services, correct products, and data on how often ChatGPT brings up your business. But I’ll be straight with you, not everything was switched on when we tested. Here’s what we saw on November 10, 2026:
| Feature | What it does | Status when we tested |
|---|---|---|
| Business info | Keep your name, address, phone, hours, and website accurate | Unlocks after ID review |
| Products | Show your offerings in ChatGPT answers and on your business panel | Unlocks after ID review |
| Mentions | How often your business comes up in ChatGPT conversations | Live, fills in once there’s enough data |
| Profile views and website clicks | How many people viewed your profile or clicked through to your site | Live, fills in once there’s enough data |
| Top discovery topics | What people are discussing when your business is mentioned | Live, fills in once there’s enough data |
| Website access check | Confirms ChatGPT can reach your website | Live |
| AI business agent | Answers customer questions on your behalf inside ChatGPT | Rolling out by business type; not yet available to us |
| $500 ChatGPT Ads credit | Credit toward advertising on ChatGPT | Offered at claim |
Check the website access card. It should say “Access confirmed.” If it doesn’t, your website may be blocking ChatGPT, and that’s worth fixing whether or not you claim your profile. Ask whoever manages your site to check its bot and firewall settings.
Whether pest control services like a quarterly plan or a termite inspection can be listed as “products” is something we’ll confirm once our review clears.
Letting your team or agency help
Once you’ve claimed your profile, you can add other people from the Invite button in the top-right corner of your dashboard. It opens “Invite business admins,” where you enter their email address.
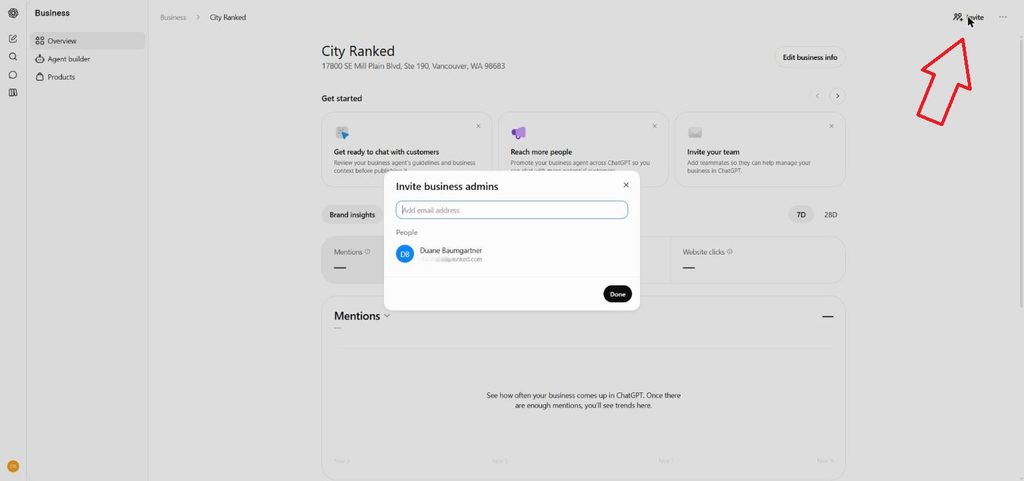
There’s only one level of access: admin. Anyone you invite gets the same full access you have. So:
- Add a second person from your own company. If the owner’s account is the only admin, the profile depends on one person.
- Invite your marketing agency only if you’d hand them the keys. There’s no view-only option.
- Your agency can’t do the whole claim for you. The owner has to complete the ID check personally. After that, the owner can invite the agency to manage the rest. And yes, that includes us.
Common mistakes to avoid
- Clicking “Create” instead of claiming your existing listing, which leaves you with a duplicate.
- Claiming under a personal email or an employee’s inbox. If that person leaves, so does easy access to your profile.
- Sending the phone code to a call-tracking line or answering service where no one can catch it.
- Typing your full domain into the DNS host field, so it ends up doubled.
- Retyping the DNS code instead of using the copy buttons.
- Letting the DNS code expire before you click Verify.
- Submitting your ID twice because the banner didn’t update.
- Doing the ID step in a dark room. Blurry photos slow everything down.
- Rushing into the AI agent before your basic business info is right.
Frequently asked questions
Yes. We claimed ours on a free ChatGPT account and weren’t asked to pay anything. ChatGPT does offer optional paid add-ons, such as advertising and a ChatGPT Business plan.
No. A free ChatGPT account worked for us. Just make sure it’s under your company email.
Go to chatgpt.com/business-hub while signed in to ChatGPT, search for your business name, and select your existing listing.
Not entirely. The ID check includes a live selfie, so the owner (or whoever’s ID is used) has to do that step personally. After that, the owner can invite the agency as an admin to help manage the profile.
First, prove you control the business with a code sent to your business phone or a record added to your website’s domain settings. Then verify your identity with a government-issued ID and a live selfie through Persona.
For us, it was about 30 minutes to verification from the time I submitted my identity check to approval.
No. ChatGPT still draws on other sources, and OpenAI can add to or change what you submit. Keep your Google Business Profile, Yelp, and other listings accurate and consistent with your ChatGPT profile.
Claim your profile and complete ID verification. Once review clears, you can edit your business info from the dashboard. Also fix the wrong information wherever else it appears online, since ChatGPT may be picking it up from there.
One account can manage more than one business. The Business Hub home page has an “Add” button. We haven’t yet tested how it handles multiple locations of the same company.
It might. The terms say ChatGPT’s AI assistant may call businesses on behalf of its users, and they include a link to opt out. Let your front desk know.
Coming next in this series
Claiming is step one. As each feature opens up, we’ll walk through it the same way, using our own profile:
- Filling out your profile: business info, hours, services, and products.
- Using the $500 ChatGPT Ads credit: what it takes to claim and what we saw when we ran ads.
- Reading your ChatGPT analytics: mentions, profile views, website clicks, and discovery topics, once there’s enough data to show.
We’ll link each one here as it goes live.
Before you go
ChatGPT is already telling people about your business. The only question is whether it’s getting the details right.
Claim it. Verify it. Keep it current. That’s the whole game, same as it was with NAP twenty years ago.
If this guide helped, save it for when you’re ready to claim yours, share it with another business owner, or send it to your marketing agency and ask them one question: why didn’t you tell me about this first?

Growing your business is a journey that begins with a single step. That step? Reach out to us and say hi.